The final step before we can start the Siebel Server installation is to configure the database server. In the last article in this series we completed the following tasks:
- Installation of the Oracle Database server on the Amazon server called Siebel Database Server.
- Creation of an Oracle Database called “SiebelDB”.
- Installation of the Oracle Client on all the servers.
Before we can proceed with the Siebel Installation, we need to complete the following steps:
- Ensure that all Oracle clients are able to communicate with the Oracle Database Server.
- Create the Table Space and the Index space for the Siebel Installation.
- Run the grantusr.sql script to create Siebel-specific users.
Configuring the Oracle Client
Before we start the Oracle Client configuration, it is prudent to boot up all the servers in the Amazon instance. This is a good exercise for the following reasons:
- The TNS Listener and the other database services can recycle properly.
- Any blocked memory can be released.
The sequence for the restart is as follows:
- Shut down the Siebel Web_Gateway_Server.
- Shut down the Siebel_Application_Server.
- Shut down the Siebel Database Server.
- Restart the Siebel Database Server and wait for all of the Oracle services to start up.
- Start the Siebel Web_Gateway_Server.
- Start the Siebel_Application_Server.
The server shutdown and the restarts can be performed from the Amazon console.
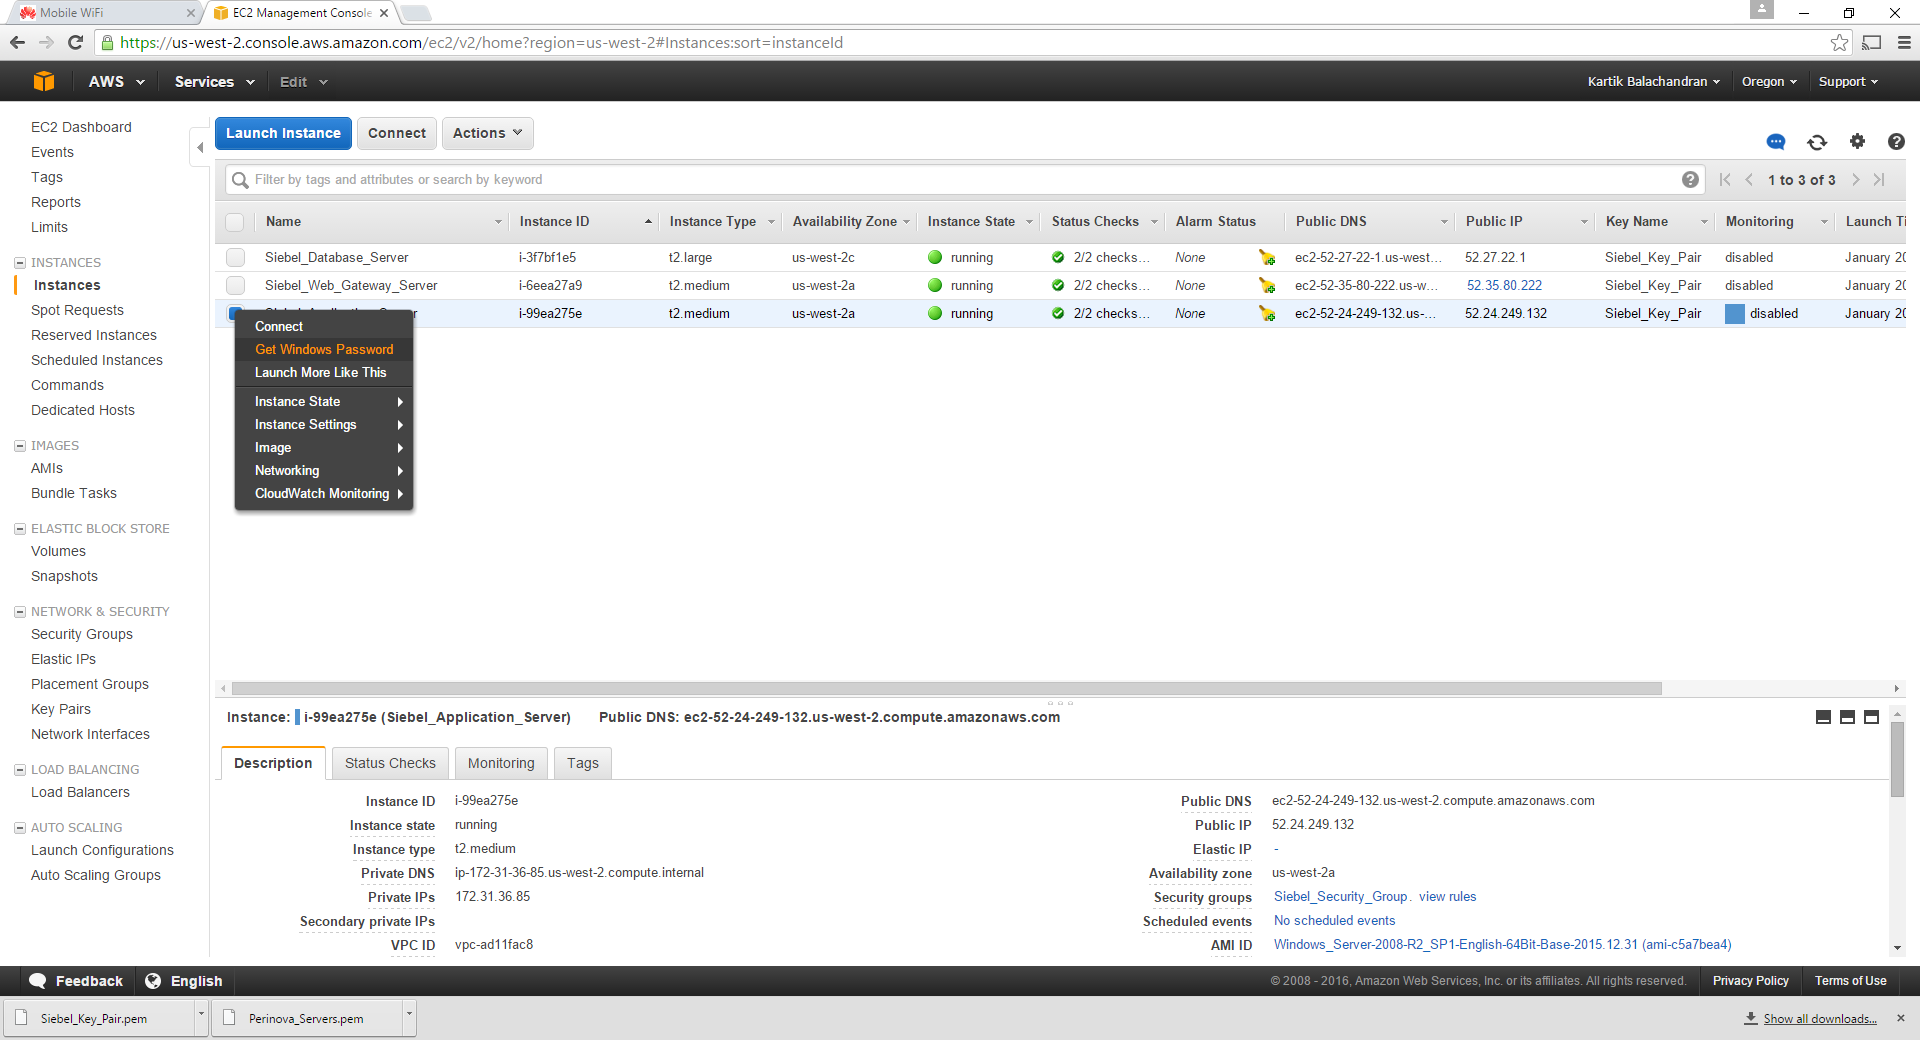
Right Click on the Server name and choose the image state. This will give you the shutdown and restart options.
Once the steps above are complete, log on to the Siebel Database server using terminal services.
Navigate to “D:\Oracle_DB_Server\product\12.1.0\dbhome_1\NETWORK\ADMIN“.
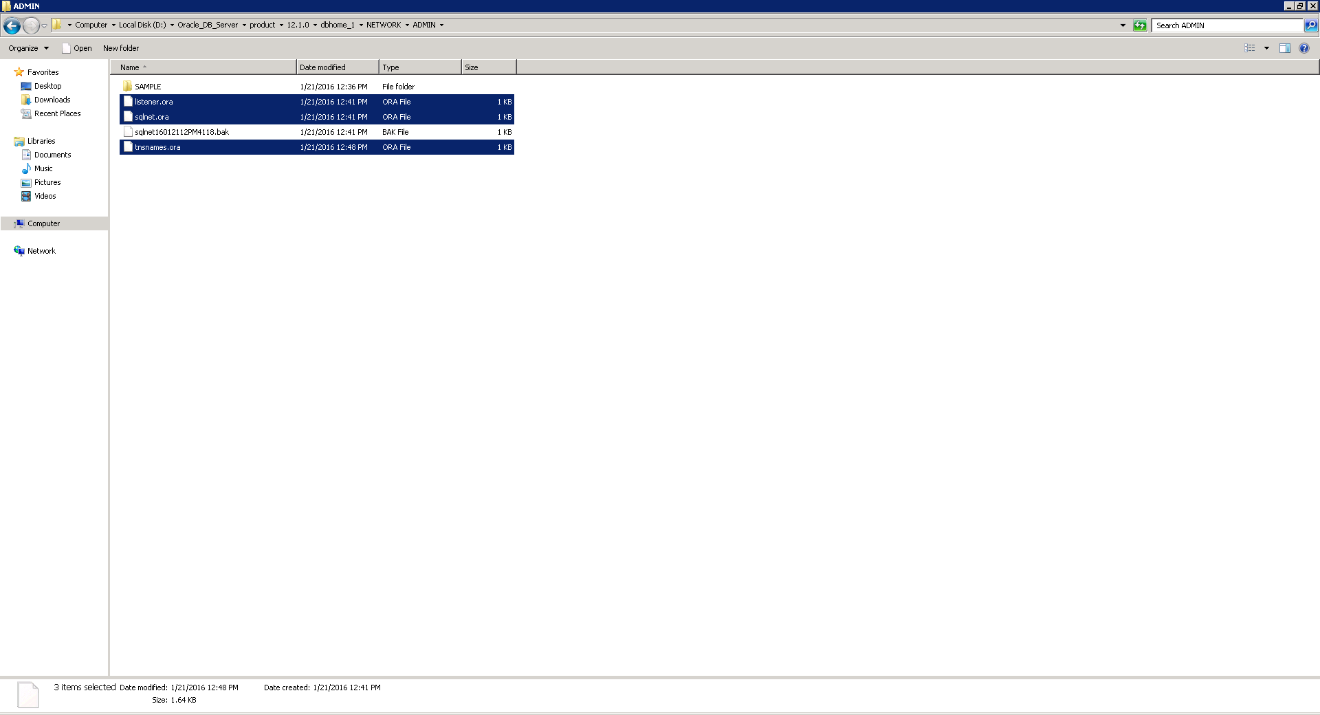
Copy the three “.ORA” files. These need to be copied to “D:\Oracle_Client\product\11.2.0\client_1\network\admin” on all the servers. Overwrite any existing files.
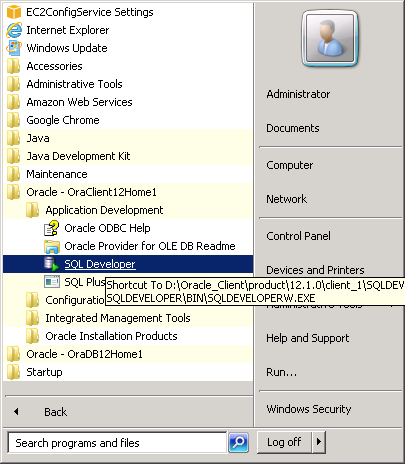
Navigate to Oracle-OraClient11Home1 -> Application Development-> SQL Developer.
If the Java client is set up properly with the correct environment variables, the SQL developer application should open up correctly without any issues.

Right click on the connections and choose New Connection.
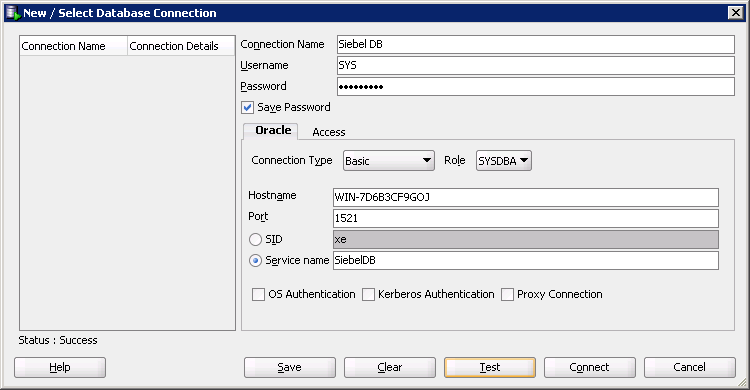
In the new connection window, the connection options should be chosen as shown in the image above and described below:
- Connection Name: Can be anything
- Username: SYS (This is one of the few logins enabled during the Oracle Database server installation)
- Password: The password which was chosen during the Oracle Database server installation.
- Connection Type: Basic
- Role: SYSDBA. (This must be chosen otherwise you will be unable to logon as SYS)
- Hostname: Hostname of the Oracle Database Server.
- Port: 1521
- Service Name: SiebelDB
Click on Test. If the setup has been done correctly, the Status should show a success.
This test must be done from all the three servers to ensure that all the Oracle Clients on the servers are able to communicate with the Oracle Database Server. If SQL Developer opens up from all three servers and we are able to communicate, then the clients have been installed and configured correctly.
Create the Index and the Data Table Spaces
Oracle recommends that the Siebel tables and indexes be loaded into different table spaces, separately from the default Oracle tablespaces. This is done primarily to have control over performance and separate out the core database server functions from the Siebel Database operations.
From any of the open SQL Developer sessions from the previous steps, run the following SQL Commands:
|
1 2 3 4 5 6 7 8 9 10 |
Create tablespace SBL_DAT Datafile 'D:\Oracle_DB_Server\oradata\SiebelDB\SBL_DAT.DBF' Size 2048M Autoextend ON NEXT 200M MAXSIZE Unlimited Create tablespace SBL_INDX Datafile 'D:\Oracle_DB_Server\oradata\SiebelDB\SBL_INDX.DBF' Size 2048M Autoextend ON NEXT 200M MAXSIZE Unlimited |
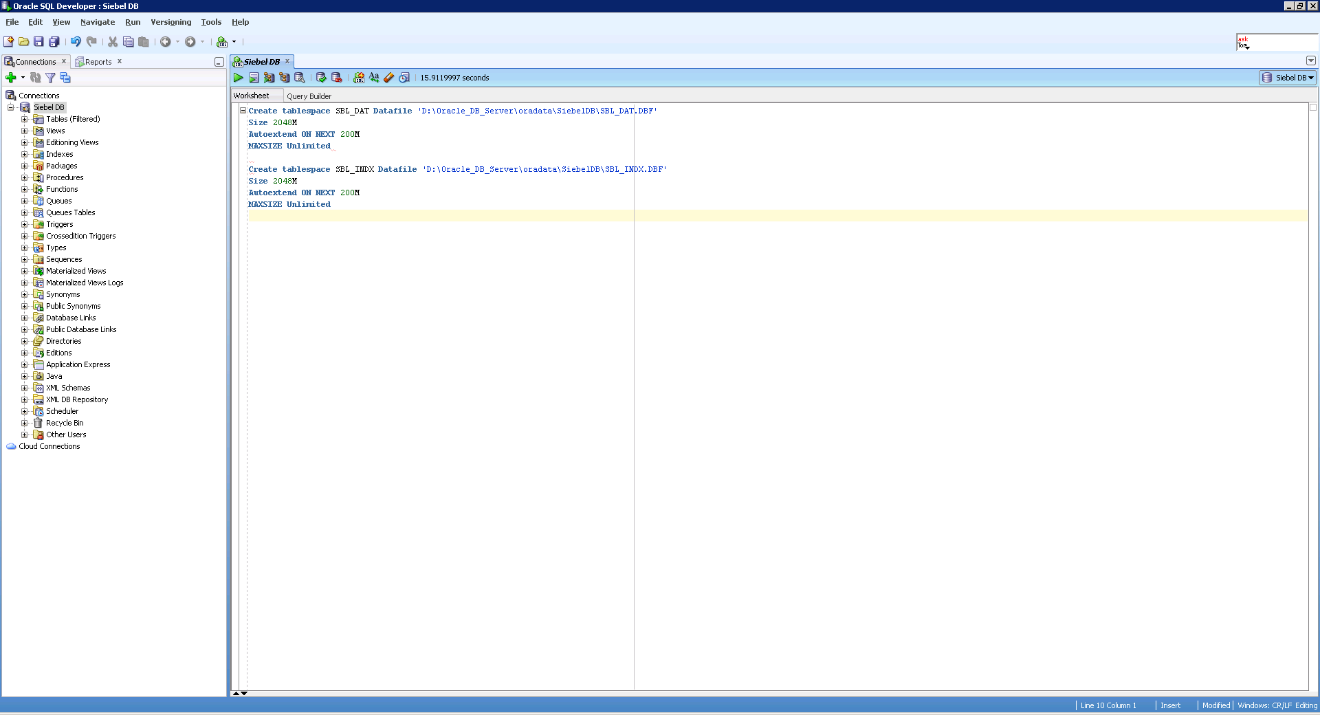
Execute the SQL and commit. This will create the table spaces for the indexes and the tables.
Grantusr Script
Grantusr.sql is a script which has been created by Oracle to create the default administrative Siebel users and grant them access to the tablespaces created in the previous steps. The file in its default format normally gets copied when we install Siebel. However, since we have not reached that step yet, we can use the SQL below to run it.
|
1 2 3 4 5 6 7 8 9 10 11 12 13 14 15 16 17 18 19 20 21 22 23 24 25 26 27 28 29 30 31 32 33 34 35 36 37 38 39 40 41 42 43 44 45 46 47 48 49 50 51 52 53 54 55 56 57 58 59 60 61 62 63 64 65 66 67 68 69 70 71 72 73 74 75 76 77 78 79 80 81 82 83 84 85 86 87 88 |
-------------------------------------------------------------------------------------------------------------------------- rem $Header: /v65/datamodel/release/oracle/grantusr.sql 1 7/13/00 4:44p Vchan $ rem rem NAME rem grantusr.sql rem rem Description rem This script creates the Oracle database roles and users for rem the Siebel Sales Enterprise. rem There are two types of Oracle users: rem 1. Table Owner (default SIEBEL) which owns all the rem database objects for the Siebel Sales Enterprise. rem This account must have resource privilege on a tablespace. rem 2. User Account. These are the accounts that SSE users rem login to. This account has select, insert, update privileges rem on the tables in the SIEBEL table owner. The user accounts rem access the database objects in the SIEBEL table owner via rem the sse_role. rem rem NOTES (Please Read The Following First Before Executing This Script): rem 1. This script must be run by an Oracle DBA Account rem 2. You must run this script in SQL*Plus because it will prompt you rem for the name of the siebel_tablespace. Alternatively, you can rem edit this script to replace the &siebel_tablespace so you can run rem the script in SQL*DBA. rem 3. We assume there is only one tablespace (siebel_tablespace) hosting both Siebel tables rem and indices. If you have additional tablespaces then you need to add the grant and rem alter commands in the script below for each and every tablespace you create for your rem Siebel implementation. rem 4. In Siebel 8.x, individual table owner grants have been replaced by a role called tblo_role. rem It is easier to manage this role rather than individual grants, plus easier to create rem and grant additional table owners (useful when having oltp and olap in one instance, rem for example). Also the new grants are to support Oracle 10gR2 and 11gR1; they contain rem privileges from depricated connect and resource roles, as well as specific privileges rem required by the Siebel application. rem rem ================================================== rem Create db account and roles for Siebel table owner rem ================================================== rem Create Role sse_role create role sse_role; grant create session to sse_role; rem Create Role tblo_role create role tblo_role; grant ALTER SESSION, CREATE CLUSTER, CREATE DATABASE LINK, CREATE INDEXTYPE, CREATE OPERATOR, CREATE PROCEDURE, CREATE SEQUENCE, CREATE SESSION, CREATE SYNONYM, CREATE TABLE, CREATE TRIGGER, CREATE TYPE, CREATE VIEW, CREATE DIMENSION, CREATE MATERIALIZED VIEW, QUERY REWRITE, ON COMMIT REFRESH to tblo_role; <span style="color: red;">rem Create SIEBEL user and replace PASSWORD with what you want to put.</span> create user SIEBEL identified by PASSWORD; grant tblo_role to SIEBEL; grant sse_role to SIEBEL; alter user SIEBEL quota 0 on SYSTEM quota 0 on SYSAUX; <span style="color: red;">rem siebel_tablespace needs to be replaced with SBL_DAT</span> alter user SIEBEL default tablespace &&siebel_tablespace; <span style="color: red;">rem temp_tablespace needs to be replaced with TEMP</span> alter user SIEBEL temporary tablespace &&temp_tablespace; alter user SIEBEL quota unlimited on &&siebel_tablespace; <span style="color: red;">rem siebel_indexspace needs to be replaced with SBL_INDX</span> alter user SIEBEL quota unlimited on &&siebel_Indexspace; rem ================================================== rem Create db accounts for Siebel users rem ================================================== <span style="color: red;">rem Create SADMIN user and replace PASSWORD with what you want to put.</span> create user SADMIN identified by PASSWORD; grant sse_role to SADMIN; <span style="color: red;">rem siebel_tablespace needs to be replaced with SBL_DAT</span> alter user SADMIN default tablespace &&siebel_tablespace; <span style="color: red;">rem temp_tablespace needs to be replaced with TEMP</span> alter user SADMIN temporary tablespace &&temp_tablespace; <span style="color: red;">rem Create LDAPUSER user and replace PASSWORD with what you want to put.</span> create user LDAPUSER identified by PASSWORD; grant sse_role to LDAPUSER; <span style="color: red;">rem siebel_tablespace needs to be replaced with SBL_DAT</span> alter user LDAPUSER default tablespace &&siebel_tablespace; <span style="color: red;">rem temp_tablespace needs to be replaced with TEMP</span> alter user LDAPUSER temporary tablespace &&temp_tablespace; |
Please pay particular attention to the text in red. The script above is slightly different from the default grantusr script since we are using multiple tablespaces rather than the single tablespace the script is designed to use. The SQL is performing the following tasks:
- Creating the SSE Role. This is required for all Database users of the application.
- Creating the TBLO Role. This is the table owner role and used only for the SIEBEL USER.
- Creating the Siebel (Table Owner), SADMIN (System Administrator) and LDAPUSER (Standard user for LDAP) users.
Execute the entire code above using SQL developer and commit the changes once executed. This will complete all the database activities. We are not yet ready for installing and configuring Siebel.
In the next article in this series, we will start the installation of the Siebel application servers for the sandbox environment.
Load comments